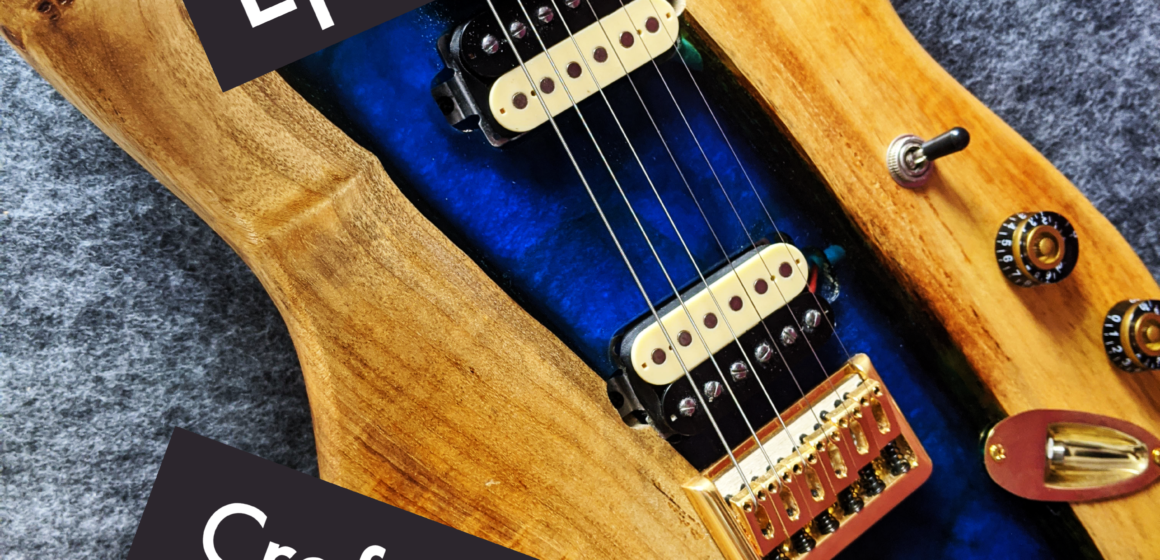
Epoxy art is one of my favorite projects of all time. I’m sure that you’ve seen amazing tables, countertops, wall art, and even instruments that have striking floods of glossy color in them. With this guide, you can learn how to create quality epoxy art on your own – plus you get to skip all of the mistake steps that I made along the way! This overview contains information that applies to all epoxy projects. If you have a specific out-of-the-box idea and get stuck, don’t hesitate to reach out to Songbirds for some tips!
Not So Fast:
There are some precautions to discuss before we learn how to make epoxy art. Failing to heed these warnings could result in damage to yourself, your work area, and the new piece that you are creating!
- Wear a respirator. A full-face one is best. Epoxy releases toxic fumes as it cures, and the curing process can take several days. It is best to work with epoxy outdoors and to leave it in a garage or closet to cure. When you are near the piece, keep your respirator on to avoid headaches and bodily harm. An N95 mask will not protect you from the fumes. Small batches may not be as harmful, but it’s best to be safe anyway.
- Protect your work area with disposable plastic sheets or newspaper. Epoxy is permanent and is very difficult to remove once it is cured. It’s best to skip the frustration and prevent messes instead of hurrying to clean them up.
- Epoxy sticks to (almost) everything. The project needs to be lifted or suspended in a way so that no other items will touch the epoxy and be bonded to it.
- Wear clothes that can get ruined. Epoxy art crafting is incredibly sloppy and you will ruin some shirts.
- Take your time. This is a project that shouldn’t be rushed. Each step has a direct effect on the finished piece, so save this one for later if you are in a hurry.
What You’ll Need:
You don’t need much to make an amazing piece of epoxy art! The bare minimum should be:
- The art piece or item that you are using for the epoxy pour, if applicable.
- At least three plastic Solo (disposable) cups.
- Large popsicle sticks or dowel rods for mixing.
- Disposable rubber gloves.
- Heat gun or hair drier.
- Hot glue glun and clear packing tape (only needed for filling voids).
- Epoxy. This should come in a set with two bottles or containers and is available at big-box home improvement stores, craft stores, and online.
- Patience.
Future Upgrades:
If you like working with epoxy, it definitely helps to get a silicone measuring cup. The bigger the better! Epoxy doesn’t stick to silicone, so anything made from it is fair game. There are some awesome molds available for making epoxy paperweights and knickknacks, plus some people have used the silicone trick to form their own molds and make amazing creations!
Let’s Get Started:
Carefully read the manual or the back of the epoxy box for mixing and curing instructions. Yes, I know that no one does that, but for epoxy, it ACTUALLY matters. The single most important step is the mixing process. Once you know what to do, pour half of what you think you need for your project into a disposable cup. You can use either epoxy bottle for this, just be extra careful to measure accurately. Most bottles have measuring marks on the side.
Note: If you spill something at this stage, quickly wipe it up. Mineral spirits or alcohol may be necessary to remove the tackiness.
Get your stirring stick ready, and pour the exact same volume into the mixing cup from the OTHER epoxy bottle. Set a timer for the manufacturer’s mixing time, and start stirring with your stick immediately. When stirring:
- Scrape the sides of the cup frequently.
- Change direction of stir every minute or so.
- Scrape the bottom of the cup as best as possible.
- Fold the epoxy in on itself, bringing the bottom of the cup to the top.
- Do not stop until after the timer runs out.
Note: If you are using colors, add them to the complete mixture before the stirring process starts. Adjust color to taste as you stir. I like using mica powder for this, and a little goes a very long way. Start small! Grainy mixture means that it is not fully mixed, or that you’ve added way too much powder.
Note on a Note: Alcohol inks or other liquid dyes should be added after the pour, if you’re going for surface colorations.
The Pour:
Now that you’ve stirred the mixture completely and your arm wants to fall off, ready the piece of art or object that will receive the epoxy. If this is a flat object that will be flooded, or an item with risk of overflow, make sure that your work space is properly protected from messes. Pouring into a sealed container or a silicon mold is the easiest option for beginners.
Slowly pour the contents of the cup into or onto your piece. Take your time and don’t worry if the finish isn’t level at first – it will ooze and level itself shortly.
DO NOT scrape the sides or bottom of the cup when pouring. This is the easiest mistake to make. Unmixed epoxy hangs out on the sides, and its inclusion can ruin your piece. Unmixed epoxy will never cure and will always remain sticky!
Leave any unused epoxy in the cup and dispose of it safely.
Note: If you want to use alcohol dyes or inks, now is the time to drop them on the epoxy. Experiment with dragging these colors through the mixture with a stick!
Heating and Curing:
Shortly after the pour, tiny bubbles will start to form and rise to the surface of your project. Grab your heat gun or hair drier and put it on the lowest setting. Quickly wave the heat across the surface of the epoxy to instantly pop all of the bubbles! You may need to do this several times after the pour. I’ve found that bubbles stop forming after about fifteen minutes.
For curing, leave the project alone for as long as the manufacturer recommends, plus at least one full day. The fully-cured project should not be tacky or gooey. It also needs to be cured on the inside at its deepest point. To test, lightly press a fingernail into the surface. If it leaves a mark or the project begins to deform slightly, it’s not ready.
Note: Dust and fiber particles in the air will land on the epoxy and can mar the finish. It’s a great idea to drape a plastic sheet over the project or cover it with a box to prevent contamination as it cures.
You’ve Done It!
Congratulations! Once the epoxy art project has cured, slowly pry it from its mold or remove it from the workspace. If there are drips or bumps from overflow, you can carefully trim them with a razor blade or a sharp chisel. Epoxy can also be sanded (a power sander is best!), but epoxy dust is carcinogenic. Sand it outside and definitely wear that respirator!
Epoxy Notes:
Epoxy is just a chemical reaction with a one-to-one ratio of base and activator. You’ll notice that the reaction gives off heat when mixed – cool! Epoxy is a pretty simple compound, so don’t worry about all the different brands that are available. They are almost all the same thing. Find one that is affordable for your price range, and check the color of the liquid before purchase. Some epoxies are more yellow than others – this just means that they have been sitting on the shelf for a while. I have used “stale” epoxy with great results, but go for the more clear ones if you’re worried.
Don’t buy the “deep pour” variants. These products seem attractive, but they actually have a lot of cons:
- Far longer cure times.
- Inability to accurately add color and texture within the piece. Pouring in thin layers offers much more control.
- Potential waste of product. If something goes wrong (like a leak), you will have wasted a lot more epoxy than if you had done a regular pour.
- Often these are more expensive than regular epoxies.
Epoxy is super hard and durable, but it’s not great for load-bearing applications. If you’re trying to make something like a guitar, a table, a bookshelf, or anything that is going to withstand a lot of force, be sure that the epoxy has proper support and bonds well to a more sturdy material like wood or metal. Epoxy can be drilled and cut when cured, but it doesn’t hold screws well and can crack easily. Always pilot drill holes first and sink any fasteners into a backing substrate like hardwood.
Special Notes for Flood and Void Projects:
Using epoxy for voids is my personal favorite and most rewarding type of epoxy project. However, it’s also the most finicky and can be frustrating. For this example, let’s imagine that we are making a tabletop with an epoxy “river” in the middle. This is one of the most complicated project ideas, so these tips will transfer to other ventures.
We will first need to support the side pieces of the table with a larger piece of plywood or firm, flat material. This will also give the epoxy as base on which to cure. Absolutely cover the support piece in strips of clear packing tape as epoxy doesn't stick to it. Try to keep the strips neatly organized, and they must overlap to prevent leaks. Arrange the table pieces exactly as you'd like them for the final product.
We’ll also need to figure out a way to box the epoxy in on the sides so that it doesn’t flow out. For this, you can use additional wood pieces for a frame that will be a permanent part of the table. You can also use the packing tape trick if you’d like to see the exposed epoxy. For this, wrap some scrap pieces of wood in tape and affix them to the sides of the project using clamps or another semi-permanent method.
At this stage, there should be a clear, boxed-in void for the epoxy to fill. It may look like it, but this is NOT ready for the epoxy and will leak. You must now use a hot glue gun to run a bead of glue across all edges of the void. Seal the tabletop completely to the bottom and side support pieces.
Don’t worry about the hot glue being visible after the pour – it won’t be. It also won’t affect the structural integrity of the piece. Pour away, and after the work has cured, carefully crack the support pieces off. If you’ve avoided leaks, this should be doable with regular hand force. If you have a leak, you might need to find a friend who can help apply more pressure.
Conclusion:
I hope that you’ve learned some great tips on how to use epoxy for your next epoxy art project! Send us pictures of whatever you create, and in the meantime, check out our other blog posts or sign up for an art class at Songbirds!


